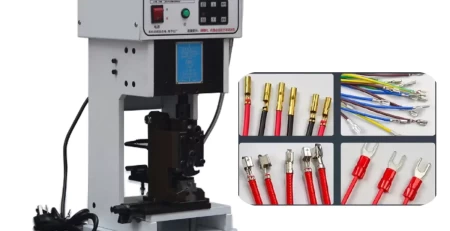
Versatile Wire Terminal Crimping Machine fuse is blown → Replace with a new one.
Versatile Wire Terminal Crimping Machine mechanical action is sluggish → Apply grease 1-3 times daily to the slider (1 hole and 3 sliding surfaces) and the die (3 holes) oil ports. Mechanical operating environment temperature (−2∘ to 50∘C).
Versatile Wire Terminal Crimping Machine motor failure (smoking, odor) → The motor needs complete replacement; pay attention to the motor’s power and voltage.
Versatile Wire Terminal Crimping Machine die is jammed and cannot slide up and down: Use a wrench to turn the screw at the end of the main shaft to make the main shaft drive the slider to move up and down, which in turn drives the punch. Check whether the upper and lower crimping blades are dented or scratched, or if a terminal is jammed against the upper blade.
Versatile Wire Terminal Crimping Machine blade die replacement: Note: When replacing the blade die, please put the machine in manual state.
Versatile Wire Terminal Crimping Machine overall die height adjustment: Loosen the punch pressing screw, and use a small round rod to rotate the adjusting screw (there are six equally divided holes on the circumference). Clockwise is up, and counterclockwise is down (rotating one equally divided hole changes the height by 0.25 mm). Adjust the punch to the appropriate position, and then tighten the punch pressing screw (this adjusts the wire core crimping height).
Upper inner blade and upper outer blade drop adjustment: For PVC (insulation) crimping height micro-adjustment, loosen the upper blade pressing screw, pull it out and rotate. There are 8 indicators from 1-8. The larger the number, the lower the PVC blade height. Each indicator changes the height by 0.1 mm. Adjust to the appropriate position (this adjusts the wire insulation crimping height).
Versatile Wire Terminal Crimping Machine feeding section adjustment: Press the up and down keys to move the slider to the highest point. Loosen the feeding lever fixed seat pressing screw, and rotate the feeding adjusting screw (clockwise moves backward, counterclockwise moves forward) to send the terminal to the center of the blade. Adjust the material sliding piece to the appropriate position to complete the adjustment.
Chain Terminal Crimping Machine: Operation Procedures and Safety Guidelines
Chain terminal crimping machines play a pivotal role in establishing secure and... read more
Operating an Automatic Wire Cutting and Crimping Machine: A Step-by-Step Guide
Automatic wire cutting and crimping machines streamline wire processing tasks,... read more
Mechanical Wizardry Decoding Automatic Terminal Machine Glitches
felicitations, Esteemed client,
Step into the world of mechanical sensations where cables dance and connections... read more
Troubleshooting Ribbon Heat Cutting Machines: A Comprehensive Guide
Demystifying Common Issues in Ribbon Shaping Equipment
Welcome to the world of efficient and... read more
Winter Maintenance for Terminal Crimping Machines
Daily Maintenance
Lubrication: The terminal crimping machine's stamping guide rail should be lubricated every 1-2... read more
Belt Loop Cutting System Troubleshooting companion for Smooth Operations
Introduction: Optimizing Your Cutting System Performance
In today's demanding textile manufacturing environment, maintaining peak operational efficiency is paramount. This comprehensive... read more
Keeping Your Apparel Production Sharp: Troubleshooting Your Jeans Loop Cutting Machine
Is your jeans loop cutting machine, the workhorse of high-precision... read more
Embrace the unborn help Cable Performance straits with Automatic Wire Stripping Innovation
felicitations, recognized patrons! Have you ever set up yourself... read more
Common Malfunctions and Solutions of Versatile Automated Medical Tubing Cutters
Our machine is equipped with a fully digital intelligent control device,... read more